Silksong Texture Modding - A technical deep dive
Hollow Knight: Silksong is already a month old at the point of writing this (which is crazy, time flies!), and already there’s tons upon tons of mods available for the game. One of these mods is called “Silksong Customizer”, which is intended to let you customize textures in the game. However, that mod is quite clunky in some ways, and so I’ve decided to tackle the issue and make a more accessible and easier to use version.
WARNING: This post is going to contain a lot of technical babbling!
The Issue#
The already existing Silksong Customizer mod does it’s job pretty well all things considered - it definitely lets you add custom textures to the game. The issue comes to the creation of custom textures, and the reason for that is summarized in one word: atlases.
Silksong (and Hollow Knight, actually!) use something called sprite atlases for their textures. For those unfamiliar - an atlas is a big texture, kind of like a spritesheet, that contains multiple sprites in one image. When the game runs, the graphics card can then easily “cut out” the right sprite from the whole image, which saves memory and increases performance.
For the purposes of optimizing the game, this is great! For the purposes of modding it, not so much, as you run into a few roadblocks immediately:
- You can’t read atlas textures during runtime, because they only exist on the GPU
- You can’t change individual sprites, only the entire atlas
Silksong Customizer simply accepts these limitations and allows modders to put in customized atlas textures, which it simply overrides - no reading required. However, these atlas textures look like this:
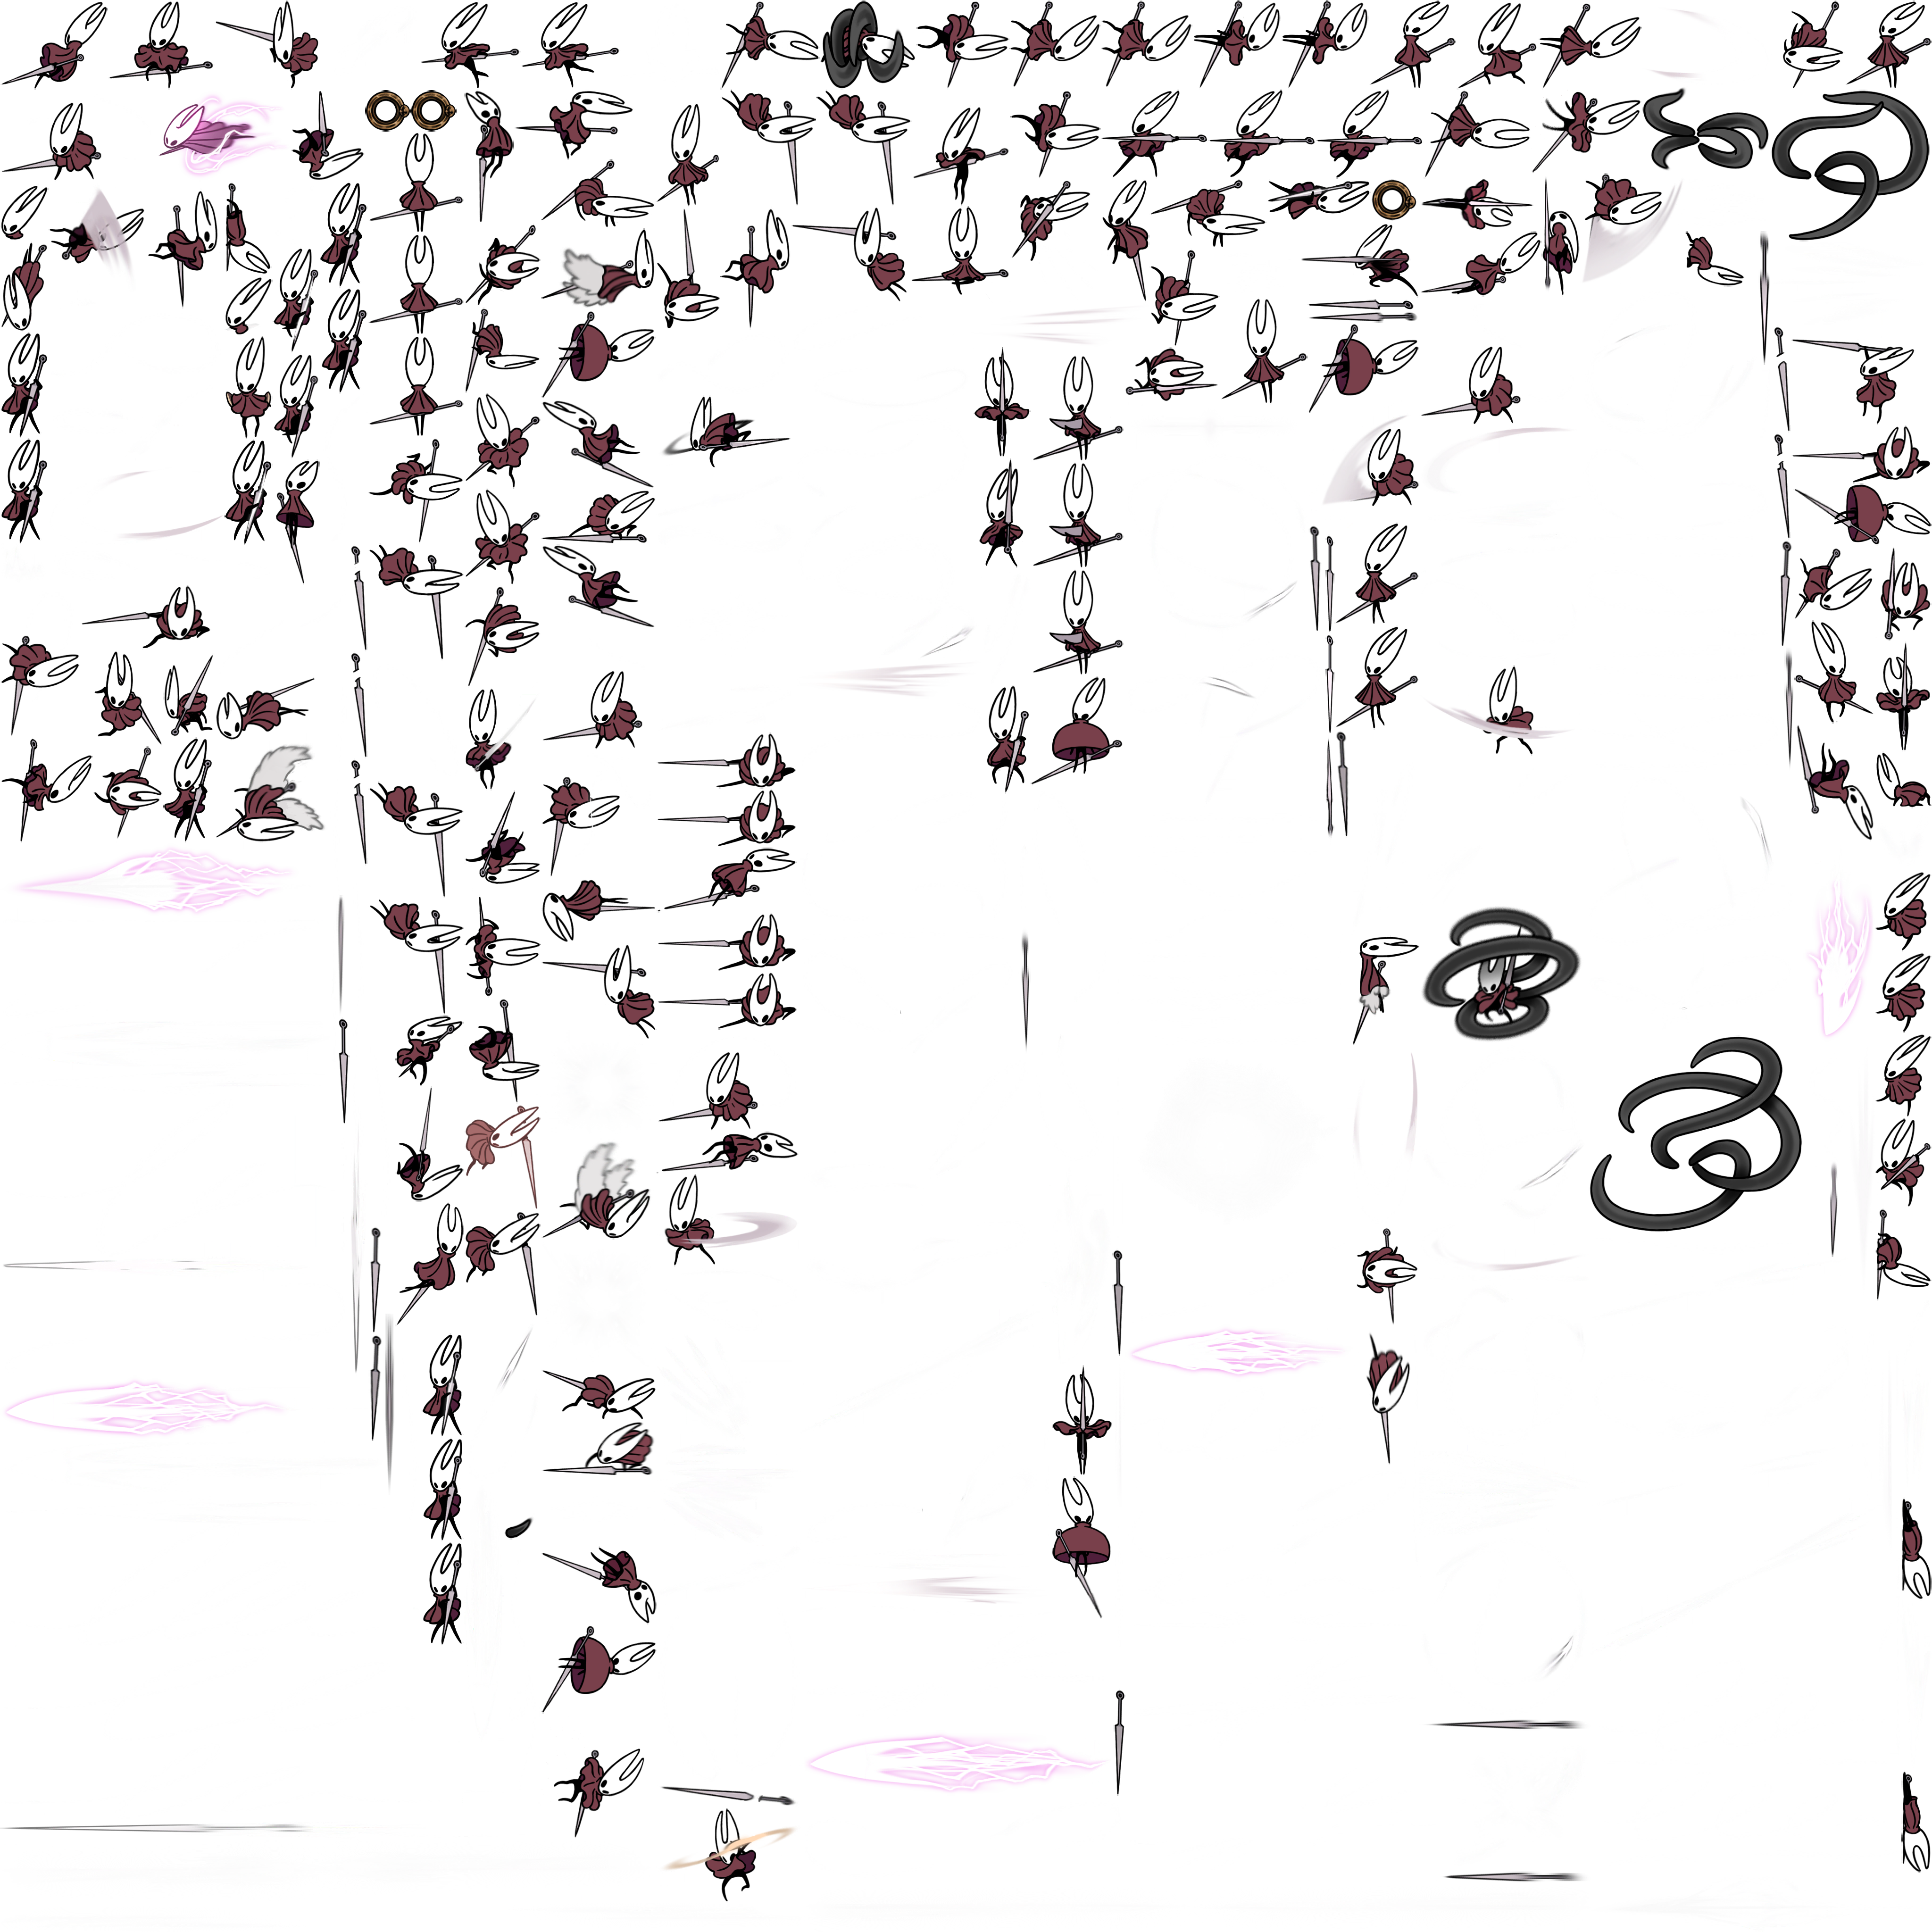
Sprite boundaries? Sprite names? None of that exists here, making editing a massive pain.
The Solution#
Ideally, we’d like individual, named sprite texture files that modders can modify. The way I went about this is by checking out how the game takes these atlas textures apart - during which I found out that Team Cherry apparently built an entirely custom rendering system for their sprites, which they already used in Hollow Knight! They call it “TK2D”, and it’s genuinely impressive how readable even the decompiled code was.
Within this system there exist tk2dSpriteCollectionData objects, which each contain one or multiple atlas textures, as well as a list of tk2dSpriteDefinition objects. Each of those is associated with one atlas texture from the collection, and contains UVs for each individual sprite.
Taking apart the atlas#
For a first proof of concept, I simply checked all tk2dSpriteCollectionData objects in any given scene in the game when they load, and I could actually compute the texture coordinates for each sprite with all the given data! The only issue I had was that, since the atlas textures themselves are GPU-bound, I could not read the actual texture data. This limitation was however easily bypassed thanks to Asset Ripper, which could extract the atlas textures from the game files directly.
Now, given the raw atlas texture as well as the coordinates and names of each sprite, I could disassemble the atlas!
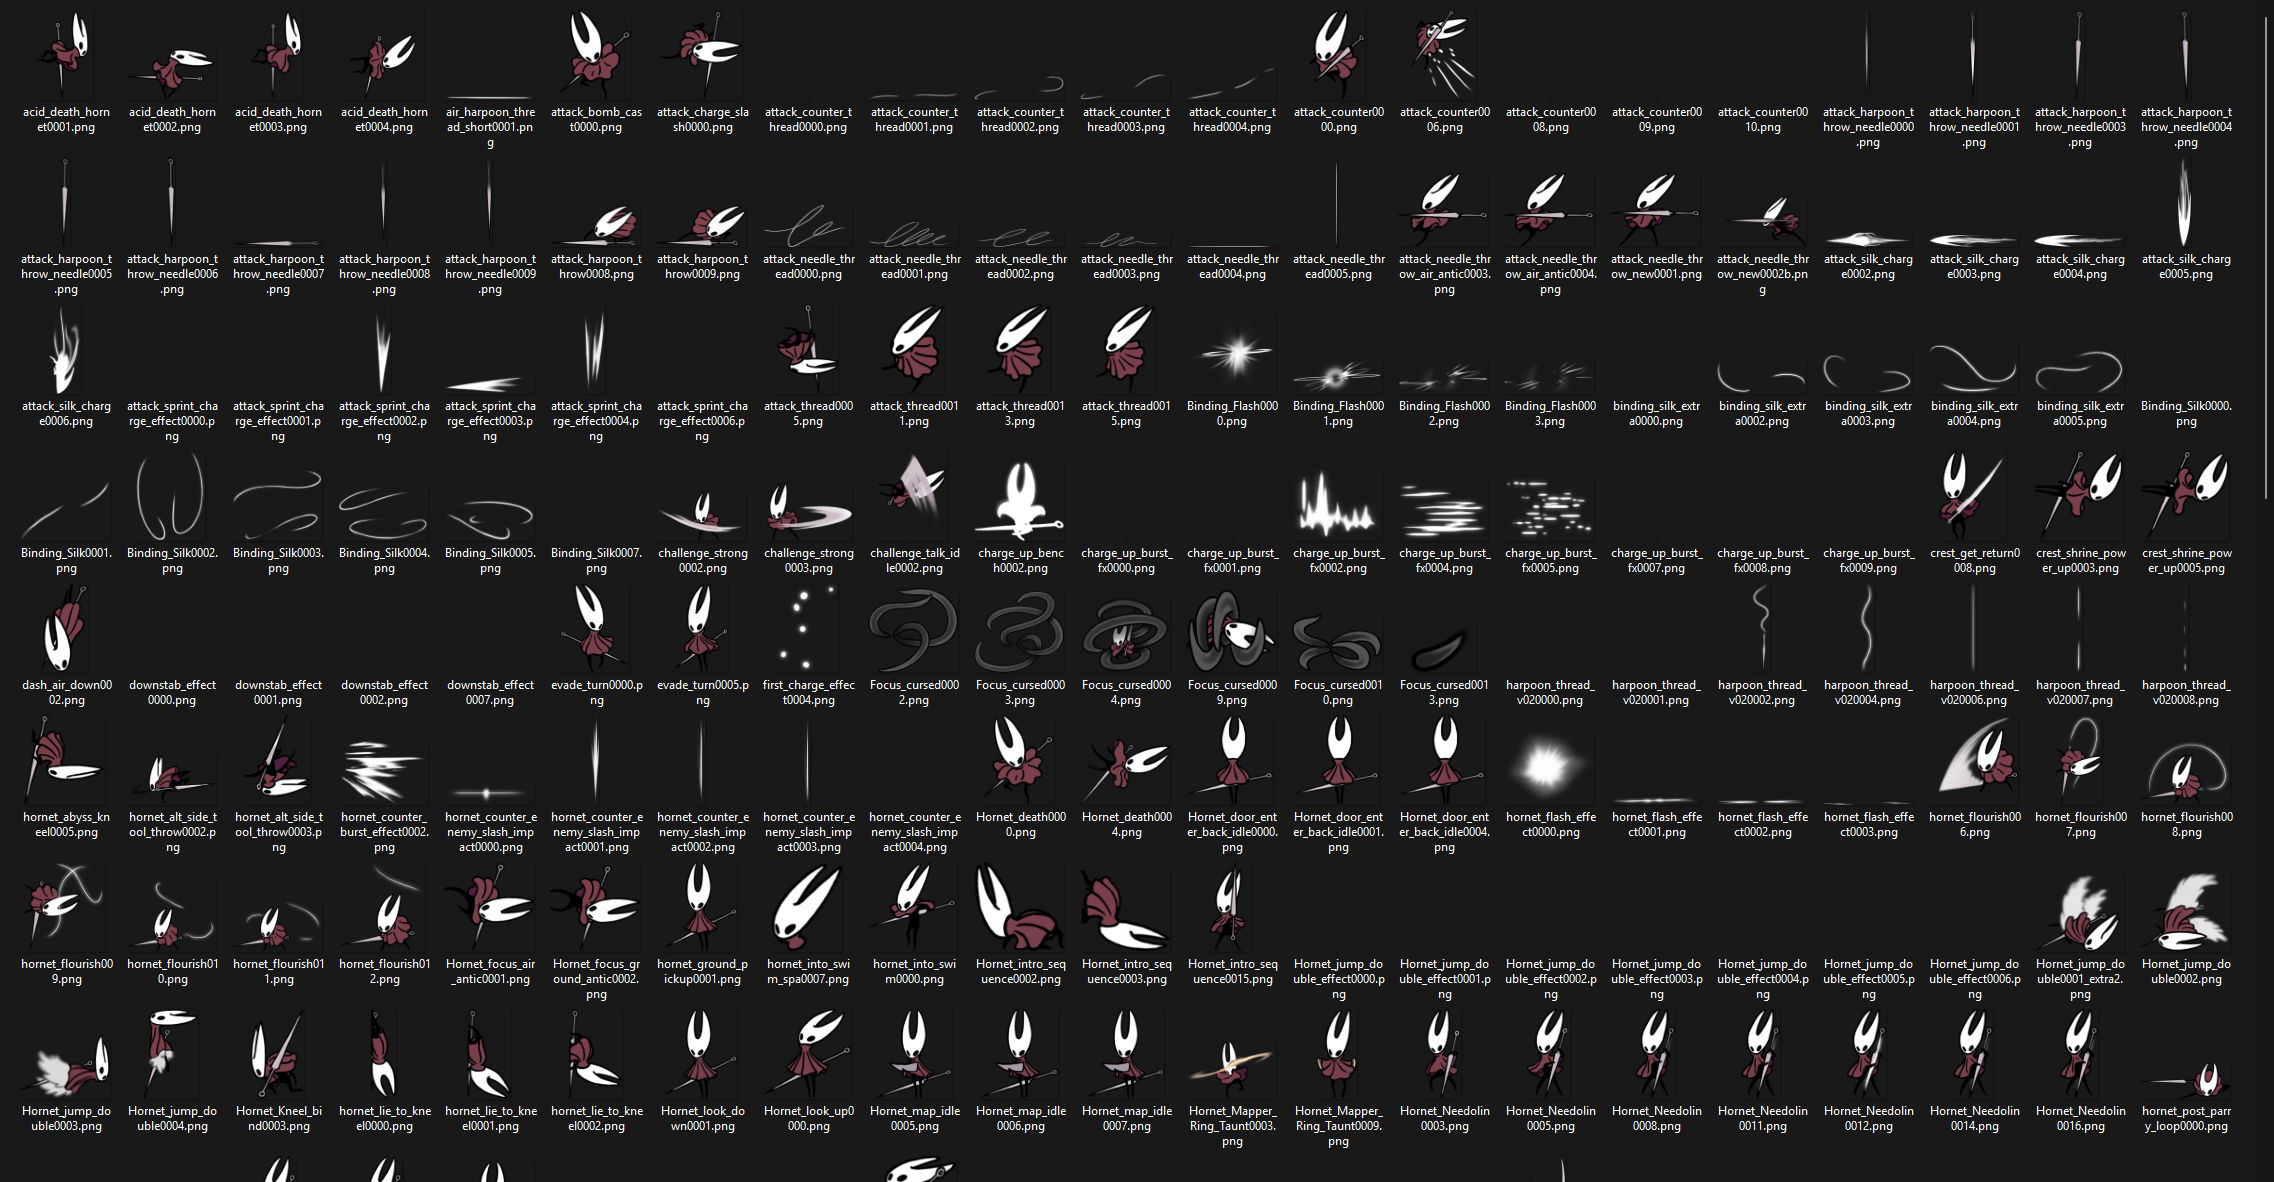
Note: Some textures are rotated. This is because the atlas is automatically generated, and it’s optimized to hell and back to pack sprites into the image as densely as possible. My PoC didn’t care about this yet, but it’s definitely possible to adjust for this rotation too!
Putting the atlas back together#
Now that we have individual, modifiable sprite files, we need to put them back into the GPU somehow. However, since we’re working with an atlas, we can only do all or nothing - either leave the base game textures, or replace the entire atlas texture. Obviously the former is not an option, so I picked the latter.
The way I did this is by simply reversing what I did to disassemble the atlas, and it looks a little something like this:
- Whenever a scene is loaded, scan all loaded atlas textures
- For each atlas, load the base game version into a CPU-controlled texture
- For each sprite on the atlas, check if there’s a modded sprite file present
- If there is, replace the pixels at the correct location in the atlas
- Once all done, replace the GPU atlas with the newly created one
This allows for individual modded sprites to be present in a dedicated mod directory, and still have them show up ingame, without affecting any unmodified sprites! All while having the comfort of actual named sprite texture files, and knowing their boundaries.
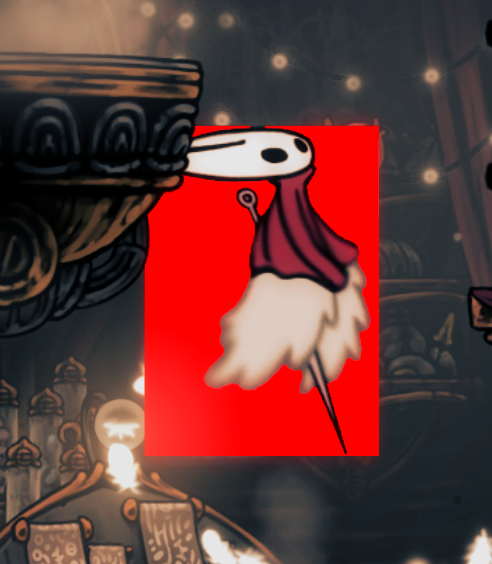
To test this, I simply took a random sprite that I could easily have show up ingame, and gave it a red background:

And once I loaded into the game, I saw this:
Currently, this system is still heavily work-in-progress. Re-building atlas textures this way is pretty inefficient, so a lot of optimization is needed before this mod really becomes viable. (In it’s current state, entering any loading zone freezes the game on a black screen for 15-30 seconds)
I don’t intend on making my Proof of Concept public, as it’s super messy and it’s main purpose was to figure out how I could approach this in the first place. Once I rewrite it cleanly, I’ll publish the source on my GitHub and I’ll make it available for download on Nexusmods too. This post will be updated accordingly when that happens.
An early version of the mod has been published on NexusMods, and the source for it is available on GitHub!